Docker Compose - Hosting some web services on a VPS

This article is meant to introduce you to web applications self-hosting. This is a funny and convenient thing to do, easily achievable using Docker containers and Docker Compose recipes.
Docker briefly
Docker basically allows one to run standardized, containerized and disposable Linux systems on a host machine. These containers are created from images, that are more or less naked-systems templates. They can be started in a few seconds and run for months, while allowing to share different things with the host machine like folders, files and network ports. The Getting started page of the Docker official documentation is of course a good destination if this is new to you.
There exists public images for a massive amount of open-source projects. In this article, we will be using 5 different images: 1 reverse proxy and 4 web applications.
Where to host
To host these services behind a public IP address, renting a virtual private server (VPS) is recommended, except if you already have a NAS at home and the appropriate rules in you box’s NAT settings. A 10-euros/month VPS is way enough to host a few services in terms of disk size and memory capacity, otherwise there are some 3-euros ones which may be nice too, like for just a blog and a password manager. Providers like OVH, Gandi or DigitalOcean are famous.
Moreover, you will need to purchase a domain name (a .fr is less than 10 euros/year) and bind it to your VPS IP address in order to access your services through a reverse proxy. A domain name also allows accessing your applications through HTTPS without self-signing certificates. That said, for testing purposes, an HTTP connection + 1 entry in your local hosts file will do.
VPS quick setup
I personally recommend installing a Debian 10 distro on your server. Once you have access to your VPS, you’ll just need to do a few things before installing Docker. You basically want to set big passwords on your users (usually a default user and root), apt update && apt dist-upgrade, disable sudo access to the default user and grant SSH access to root via RSA keys. Indeed, you will certainly log in to your server as root like 90% of the time.
The container infrastructure
Traefik is a great reverse proxy which is meant to work with containers systems like Docker. The official image can be found in the Docker Hub. The role of Traefik as a reverse proxy will be to publish ports 80 and 443 of our VPS, and route communications through these ports to the appropriate backend services. Said services will be:
- Bitwarden: A quite perfect password manager
- Nextcloud: A great personal cloud where you can sync and edit files, calendar, todo lists, bookmarks, notes…
Below is a diagram that can represent the network architecture we are going to setup. Circles are networks and rectangles are containers. Networks' IP ranges are explicited, as well as containers IP addresses and exposed ports.
Some containers like Nextcloud require a database running in a second container (e.g. based on mariadb image). A dedicated Docker network must be created to make them reach each other. We could just put the databases containers in the webgateway network, but it’d be very dirty as we don’t want to route databases to Traefik directly.
Before moving on to the next part, let’s talk about how HTTP(S) communications between the containers. Traefik exposes ports 80 and 443, but every request sent to port 80 will be redirected to port 443, and forced to use HTTPS. Then, the reverse proxy will decrypt the traffic, and forward it to the appropriate backend service in plain HTTP (most of the time). This is mega convenient because we do not have to bother with HTTPS certificates on each service, all is happening on the front container. What is also mega convenient is the ability of Traefik to automatically generate HTTPS certificates for each of our exposed services using Let’s Encrypt.
From docker to docker-compose.yml
Docker “vanilla” could be enough to run this bunch of containers together.
| |
The above command would launch a basic (incomplete) Traefik instance.
-p 80:8000 will publish the container’s port 8000 on the host’s port 80. -v ./conf:/etc/conf will reflect your ./conf directory as the container’s /etc/conf. I’ve seen people being able to perform Blind ROP over ARM64 binaries but who can’t remember in which order to setup a volume 😔Even if this command is already quite lengthy, it’s missing for example some more volumes to share data with the host, or labels to make the Traefik instance communicate with other containers.
Besides, if this service needed to run an additional container for serving a database, it would require to run 2 docker commands and it’d be even messier. We basically just want to have a clean “on/off” button at a service level, not at a container level.
Docker Compose is made for us, because it makes possible to describe a whole service inside an unique YAML file. Once again, the official Overview of Docker Compose provides a good example to understand how it works. Furthermore, The Compose file reference is an exhaustive list of configuration options available using this YAML syntax.
The previous vanilla docker command can be translated in Docker Compose like the following, inside a docker-compose.yml file (In an appropriate folder, like /root/docker/traefik).
| |
docker-compose.yml files for Traefik, Bitwarden and Nextcloud, as well as the traefik.toml configuration file.To run it, simply cd next to the compose file and run docker-compose up. docker-compose automatically finds the ./docker-compose.yml file and “runs” it.
| |
No network has been specified in our compose file, so Docker creates a traefik_default one to put the container inside. The traefik:2.4 image is pulled if it has not been already, the container traefik is created, and the terminal hangs: logs from the container are reflected on our terminal.
That’s it, running docker ps -a in another terminal confirms that the container is up and running.
| |
ss allows to check that networks ports are published:
| |
Viewing the container logs in real-time on the terminal is useful to check that everything is going well starting the service. Here, Traefik didn’t log anything because we didn’t provide any config file. So even if the container is launched, the service running inside isn’t living yet. To detach, Ctrl+C must be hit, stopping the container like docker-compose stop would. To remove it, run docker-compose rm. Alternatively, docker-compose down can be launched, which is a shorthand for docker-compose stop && docker-compose rm. Then, to run the container(s) described in ./docker.compose.yml in background, do:
| |
And the input is given back.
From now, running services will always be the same. We just have to edit the different docker-compose.yml files and go up -d/down.
I mainly use these aliases which I love because d.o.c.k.e.r.-.c.o.m.p.o.s.e is so long to type.
alias dc='docker-compose'
alias dcss='docker-compose stop && docker-compose start'
alias dcu='docker-compose up'
alias dcd='docker-compose down'
alias dcud='docker-compose up -d'
alias dcdud='docker-compose down && docker-compose up -d'
Writing the recipe
Volumes
So first, let’s add a few volumes to sustainably save some data from the container. Indeed, removing a container and recreating the same will by design erase all data from the first one. We will create volumes to provide a configuration to Traefik, and to save the produced logs and HTTPS certificates. Every other pieces of the container are disposable.
| |
/var/run/docker.sock:/var/run/docker.sock:ro: This is used by the container to receive information from the Docker Daemon../conf:/etc/traefik: Theconfdirectory next to thedocker.compose.ymlfile is bound to the/etc/traefikdirectory of the container. This will ensure that our./conf/traefik.tomlconfiguration file will be passed to the service.cert:/letsencrypt: Will contain the HTTPS certificates from Let’s Encrypt. Traefik automatically generates HTTPS certificates from the config file.logs:/var/log: Will contain HTTP access logs and Traefik logs.
There are 2 types of Docker volumes:
- To make a bind volume, declare it using a path like
./confor/home/root/docker/traefik/conf. - To make a named volume, declare it using a name like
certorlogs.
Named volumes data is stored under /var/lib/docker/volumes/<volume_name>/_data/ which is only accessible by root. Also, named volumes appear in the docker volume ls command output:
| |
As you can see, the ./conf bind volume isn’t mentioned, but the cert and logs ones are listed, their real name being automatically prefixed by the name of the directory containing the docker-compose.yml file (and not the name of the service inside this file, as we could believe).
| |
As a result, I recommend treating bind volumes as inputs and named volumes as outputs. Bind volumes can be versioned in a git repo and be quickly updated inside containers, whereas named volumes are a clean way to store files from containers, while easier to backup.
Networks
The network configuration cannot be easier. As shown in the container infrastructure diagram earlier, we will have 2 different networks:
webgateway(172.10.0.0/16): The main network, every container inside it should be routed through the reverse proxy.nextcloud(172.30.0.0/16): Just for the Nextcloud container and its database.
To create them, use the following command by adapting the network name and the IP ranges:
| |
Then add the networks section in docker-compose.yml:
| |
The IP environment variable can be passed through the .env file, automatically sourced by Docker Compose.
| |
Most services require the administrator to provide clear-text credentials to the containers through environment variables. This sensitive data must not appear directly in compose files, because versioning them, with git for example, would compromise the security of the services or even the server’s. But putting this kind of variables inside .env files is relevant only if you exclude them from git index, so make sure to add **/.env to .gitignore.
Also, run find /root/docker/ -type f -name '.env' -exec chmod 0600 {} \; to make .env files readable only by root.
Labels
As per the Docker documentation:
Labels are a mechanism for applying metadata to Docker objects.
You can use labels to organize your images, record licensing information, annotate relationships between containers, volumes, and networks, or in any way that makes sense for your business or application.
Traefik configuration can be passed in the traefik.toml file or directly inside the docker-compose.yml one. It’s nice to keep the global configuration in a separate file, and to embed the configuration specific to each service in their docker-compose.yml’s labels section. I won’t detail here how to write a proper traefik.toml file, but this is where entrypoints, HTTPS certificates, or log files paths are configured. You can find a complete one in appendix, all you need is the Traefik documentation to understand and adapt it.
In the Traefik compose file, dynamic configuration still has to be passed via labels to make the Traefik service work.
| |
The above configuration will make available the Traefik’s dashboard at https://traefik.thbz.site, behind a basic authentication.
The below schema from Traefik routing overview may help you understand what routers, middlewares and service mean.

Routers catch the requests, and they pass it to potential middlewares (to add an authentication layer, or HTTP headers on-the-fly). Finally, services (containers) receive the requests and treat them.
The USERNAME and PASSWORD environment variables have to be added to .env:
| |
You can use the htpasswd utility from apache2-utils to generate a MD5-based password hash.
Run htpasswd -n <your_auth_basic_username> and you’ll be prompted twice to enter and confirm your password. Then the string <username>:<password_hash> will be displayed, and you just have to put the values in the env file.
Powering up
Starting the container and reaching https://traefik.thbz.site may warn about insecure HTTPS connection. It’s because Traefik didn’t have enought time to receive certificates from Let’s Encrypt, so the TRAEFIK DEFAULT CERT is used, which is self-signed. Waiting a few minutes solves that.
First, the application prompts for basic auth credentials, as configured.

Then the Traefik dashboard displays itself, like the following.

This interface provides a good overview of running HTTP routers, services and middlewares.

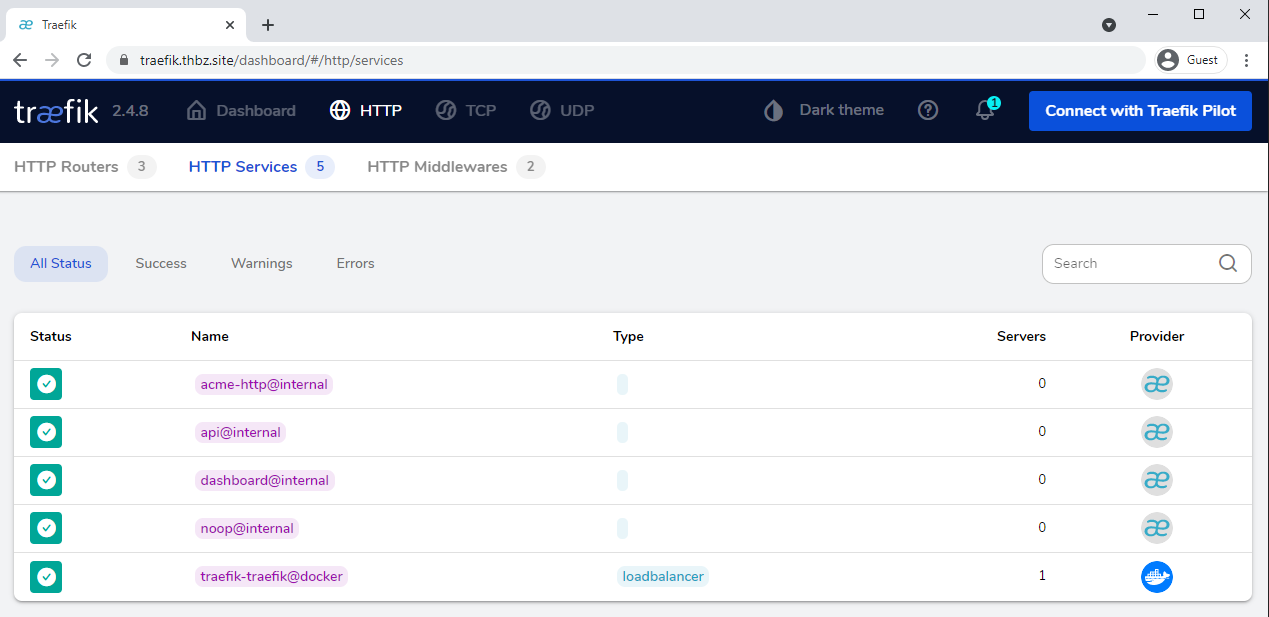

It is cool to have such a user-friendly monitoring dashboard, but it isn’t necessary in itself and usually serves for debugging.
So we’re done with configuring the Traefik service! One last setting you can put in docker-compose.yml is
| |
or
| |
, it’s up to your preference.
The final compose file is in appendix, so let’s finally see how we can use this reverse proxy to self-host web apps!
Plugging services to Traefik
It’s impressive how easy it is to plug a new web service to Traefik, once you have your docker-compose.yml template. It’s a matter of minutes, and you can literally setup any application whose purpose is to expose a port and communicate through it via HTTP.
For each new service, we’ll want to edit these parts of the compose file:
- The service name
imagecontainer_namenetworks(if we add a second one)volumeslabels
Other services can get rid of the ports part. The goal of a reverse proxy is precisely to not expose ports directly.
The sections environment and depends_on may be added too. The first one can be used by the service to get environment variable (acting like pieces of configuration), the second is used to “bind” a container to its database: if the database doesn’t work, neither does the main application.
Bitwarden
Let’s start by adding a password manager. Bitwarden is a great one, and even if the official image requires a lot of RAM, a rewrite in Rust has been made which is really optimal.
The ìmage to use is vaultwarden/server:1.21.0, and the container_name becomes of course bitwarden. We don’t have to touch the network section as no database container is required. We want to keep in a volume only 1 directory of the container: /data. It is where everything useful is stored: RSA keys, SQLite database and website thumbnails. Two environment variables are passed to the container: WEBSOCKET_ENABLED=true and SIGNUPS_ALLOWED=false (don’t forget to turn signups on when registering your own user, and turn them off again). Finally, 7 differents labels are applied to communicate with Traefik:
| |
It allows to access the Bitwarden instance via https://bitwarden.thbz.site using the certificates from the Let’s Encrypt resolver. Traefik communicates with the port 80 of the container, and it is in the webgateway network.
Replacing all the above parameters in /root/docker/bitwarden/docker-compose.yml (without forgetting to declare networks and volumes at the end of the file) is sufficient to self-host your own password manager. To start it, run cd /root/docker/bitwarden && docker-compose up -d, and go to https://bitwarden.thbz.site.
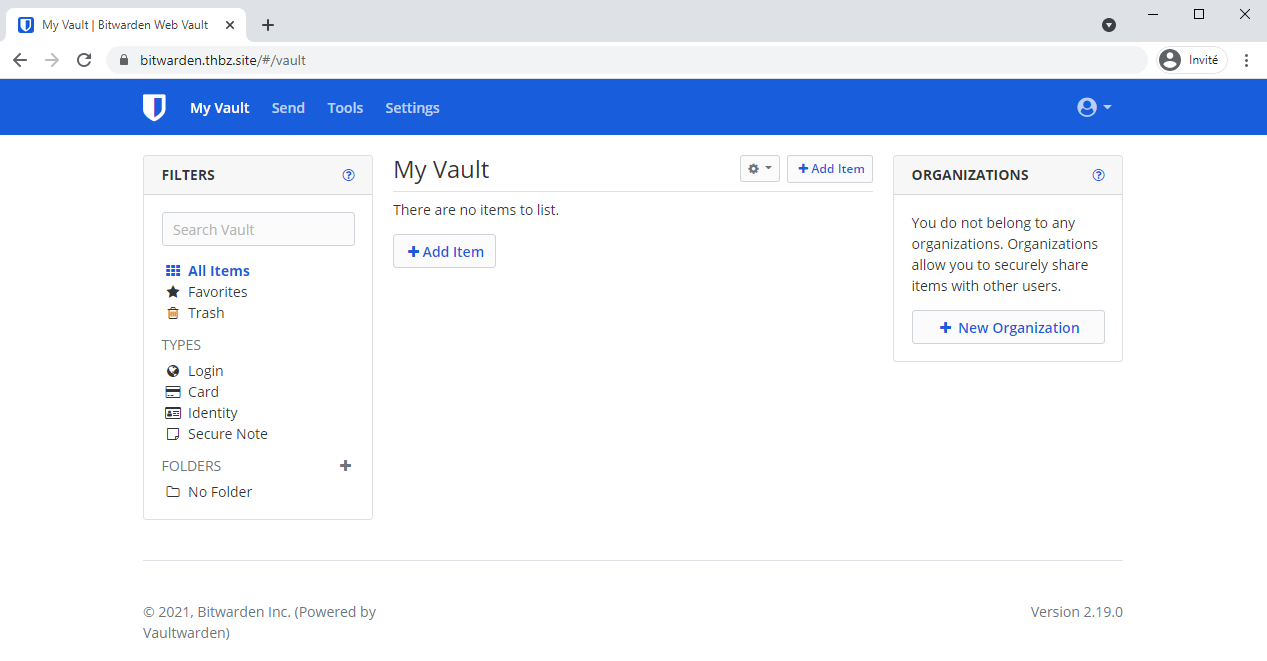
If SIGNUPS_ALLOWED is set to true, a form allows us to create a user. Then, the index page show itself and that’s it.
Nextcloud
Now that we’ve seen a quite basic example with Bitwarden, let’s talk about Nextcloud, which is a famous and very nice cloud platform. When it’s started for the first time, it includes basic yet useful features such as files storage and synchronization through clients for Windows, Linux and macOS. Then, you can start customizing your instance with dozens of community-driven plugins to do notes taking, bookmarks saving, todo list management, or even cooking recipe storage.
The official image to use is simply nextcloud, and we’ll use version 21. Even though Nextcloud can run with a SQLite database, it is not recommended for performance reasons. Thus you’ll need to run a mariadb:10 container next to it.
The full compose file to setup is once again in appendix, but let’s explicit some parts of it.
First, the networks section. The nextcloud_db container is only in the nextcloud network, which is disconnected from traefik. Therefore, the nextcloud container must be in the webgateway and the nextcloud networks in order to communicate with both traefik and nextcloud_db.
| |
Then, there are some new labels, enabling some Traefik middlewares.
| |
There are just one middleware to set the value of the HSTS header to max-age=15552000 as recommended by Nextcloud, and another redirecting requests to https://nextcloud.thbz.site/.well-known/caldav and https://nextcloud.thbz.site/.well-known/carddav to https://nextcloud.thbz.site/remote.php/dav/.
Before starting the service, let’s fill the .env file.
| |
Then, cd /root/docker/nextcloud && docker-compose up -d.
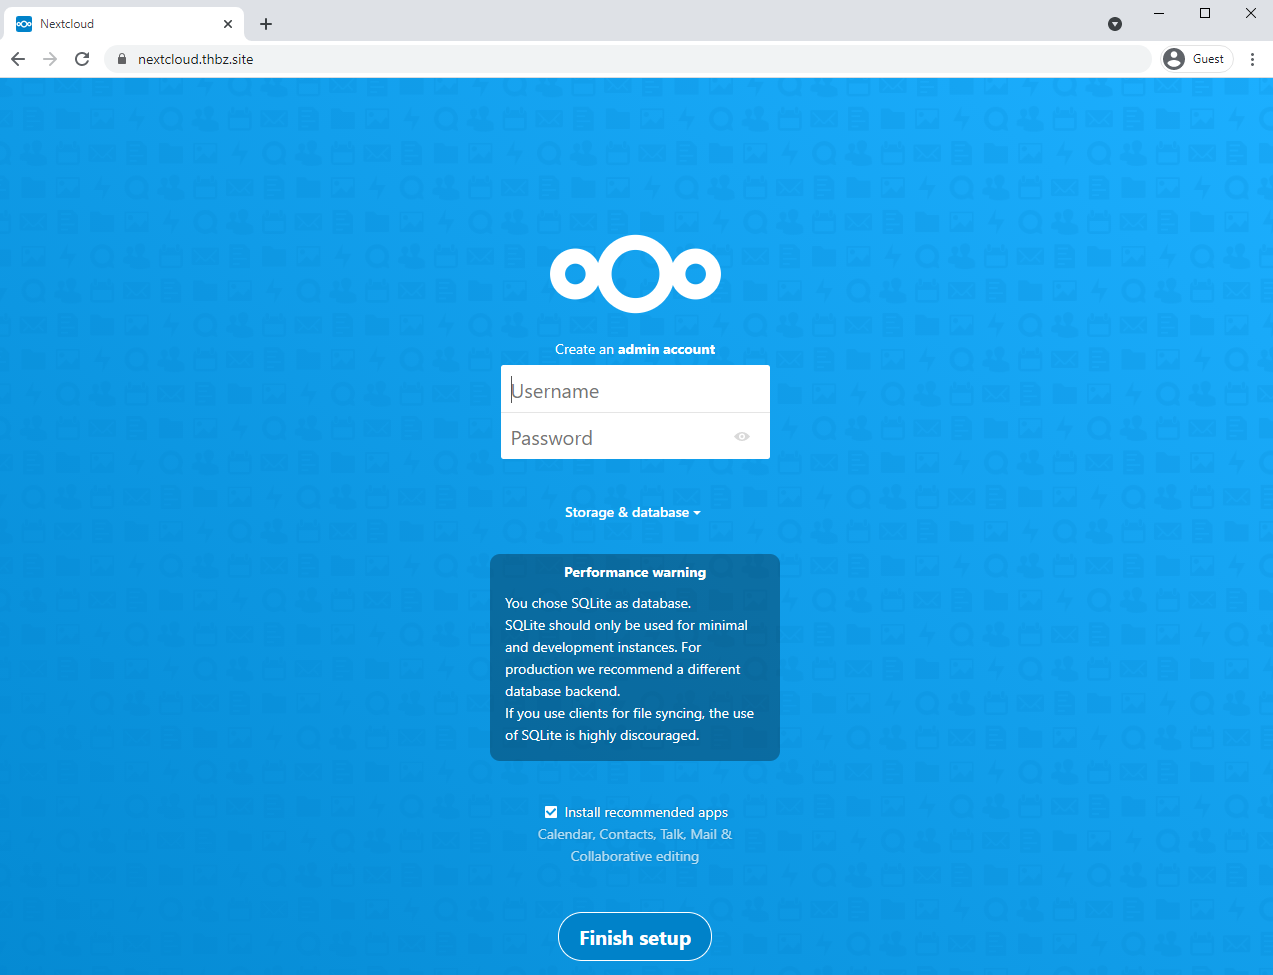
Accessing https://nextcloud.thbz.site shows the Nextcloud page meant to create an admin user, as intended.
Fill it like the following. The database credentials are the MYSQL_USER and MYSQL_PASSOWRD envars. In order to get Nextcloud knowing which host holds its database, we have to specify nextloud_db in the last input field. We could also specify an IP address as we harcoded them, but the hostname is automatically handled by Docker so it’s convenient.
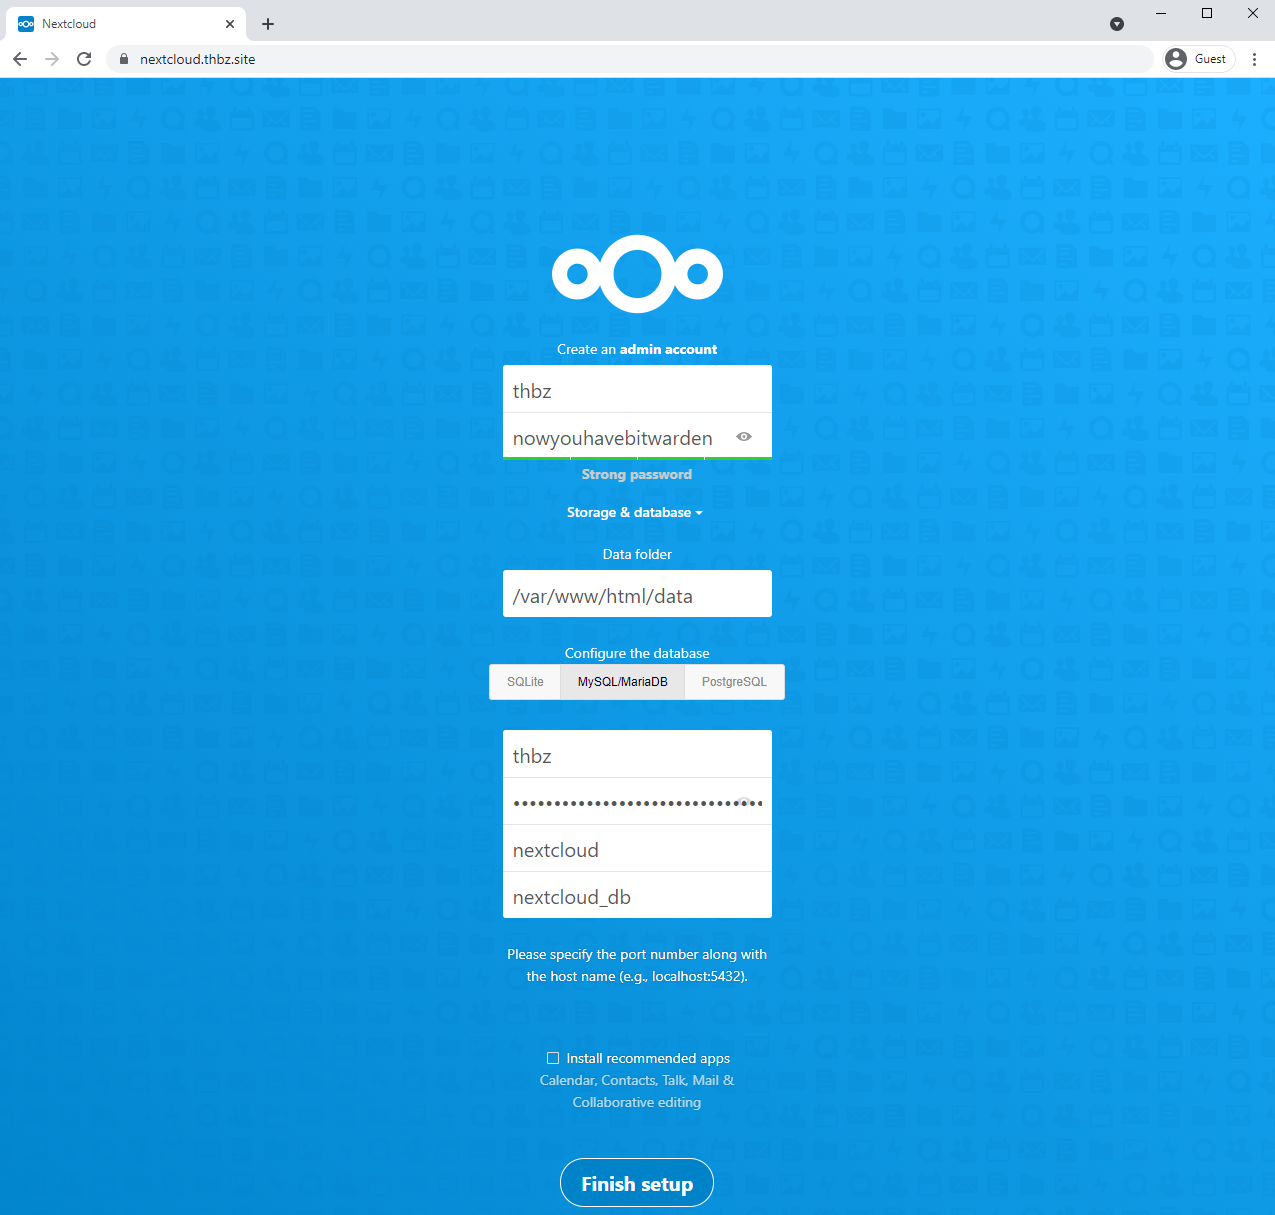
After submitting the form, the application loads and we are granted with the Nextcloud index page.
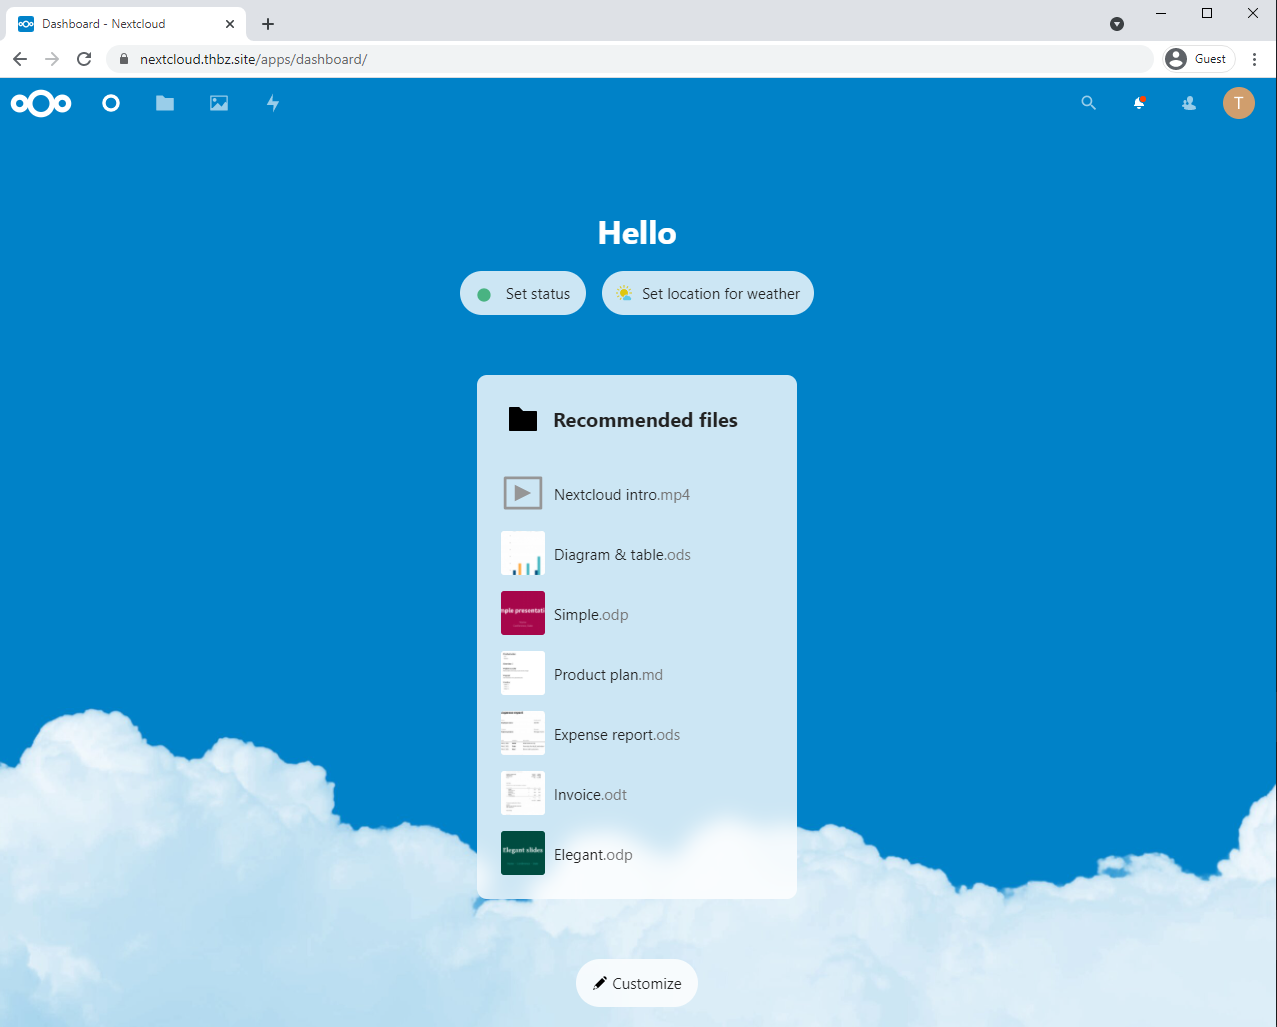
You can now synchronize your files, bookmarks, etc. on a server that you own!
More
Backups
When self-hosting important applications, it is very important to care about backups (even OVH can burn 🙃). As a newbie-learning-on-the-job sysadmin, I suggest you code a script yourself that does something like:
- Stop services to backup
- Compress
/var/lib/docker/volumes/xx/_data/into/home/backups/xx/xx.tar.gzandchownto a specific userbackup - Restart the services
Put the script in crontab, periodically download on your PC generated backups via SSH, and store them on an external drive. In theory, restoring a service by running a fresh container and binding it to backed up volumes would work. If not, the involved service should return like a 500 error or something, certainly because backed up data is not sufficient to fully restore it. Therefore it will be necessary to dig this issue and find what else has to be saved.
Capturing network traffic
Docker networks and containers are doing networking through network interfaces, like everyone else. That means you can capture the traffic passing through these interfaces, and that’s cool. This is a little bit useless, but it may help you debugging a service one day.
You can get the network interface of a container like this:
| |
The same way, the interface of a network:
| |
Then you can use tcpdump to capture traffic:
| |
Conclusion
I hope this made you want to at least give a try at running your own services, if you’ve never done it before. I personally self-host some everyday webapps for ~2.5 years, and I’m continously learning about how things work and best practices. That said, I’m still quite a noob and I’ve never practiced sysadmin stuff in a professional context, so I hope I didn’t say too much bullshit in this post. 🙂
This article isn’t frozen and may evolve if I think that I should add some information or edit some. Don’t hesitate to ping me on Twitter (@thbz__) if you have any question or any remark! I’ll be glad to exchange with you.
Also, please remember to be careful about self-hosting sensitive things. When you register to online services, free or not, it generally comes with a disponibility guarantee. Here, you are on your own so you must take care of your apps' disponibility and security in general. It’s worth only if this is a hobby for you!
Thanks for reading, bye!
Links
- Docker Compose file v3 reference
- Gettings started with Docker
- Docker volumes
- Docker bridge networks
- Networking in Docker Compose
- Traefik documentation
- Traefik automatic HTTPS
- Nextcloud user manual
Appendix
These compose files and associated configurations are also available on GitHub.
Traefik
/root/docker/traefik/docker-compose.yml
| |
/root/docker/traefik/conf/config.toml
| |
Bitwarden
/root/docker/bitwarden/docker-compose.yml
| |
Nextcloud
/root/docker/nextcloud/docker-compose.yml
| |
